Monday 27 May 2013

Paper Circles

Paper Circles (by a 7 year old)

We do seem to have had a run of Deep Space Sparkle lesson plans over the past few weeks. I will have to come up with some of my own!  This is another one from my ecourse Teaching Art 101.

After a few weeks of clay and painting I wanted an easier lesson that used different skills.  Cutting and pasting is a great task to practice as it further develops those important fine motor skills.  I told the children that cutting practice can actually help their painting and drawing in future lessons.

I was actually surprised at how many children struggled to cut out a neat circle or oval.  Giving your children sissors to play with can be a bit scary (we have all heard of or witnessed the lovely haircuts children can give to each other or themselves) yet it's a really important skill to master.  Not only does it develop fine motor skills it teaches them how to focus, concentrate and go slow, skills I'm trying to instill in them during the classes.

We only did this lesson with my Tuesday class as the Thursday class works a lot slower and was behind on a few things.

My teacher example
You will need:
  • Lots of coloured paper
  • White Paper
  • Black paper for background
  • Sissors
  • Glue Sticks
How To:
  • Ask the children to cut 5-6 large white circles
  • Then ask them to cut slightly smaller circles of various colours to fit inside these circles.
  • They keep cutting more and more circles and pasting these inside the larger circles.  
  • Keep going until all large white circles are filled with colour
For older children they can cut out the circles free hand.  For the younger children (Prep) I told them they could use a pencil to draw some of the circles and then cut them out.  We had a competition going on how many circles can you fit inside the white one?  I think the record was 11.

The Results:


Saturday 25 May 2013

Leaf Prints with Paint

Leaf Prints
I love the colours of Autumn.  Even though the weather has started to get colder the beautiful reds, oranges, golds and yellows of the trees always make me feel happy.  I just love leaves, they can be pressed into clay, salt dough, air dry clay, plaster, play dough, cookies or paint.  Their shapes and veins always leave a lovely impression or shape.

Part of the fun of any leaf exercise is collecting them.  We took a long time to get home from school this lesson day as the children collected and gathered leaves as we walked along.  We even collected more from our garden when we got home and during the lesson.

Leaf prints with paint are really easy to do.  This lesson was inspired by Deep Space Sparkle again.  However a quick google on leaf prints brings up lots of lovely ideas if you want to try something a little different.  I really love the bag and gift cards done by Skip to My Lou.

You will need:
  • Leaves (try to pick some off the actual trees so they are not dry and crumbly)
  • Poster Paint in White and Autumn Colours
  • Scrap pieces of newspaper
  • Small sponges (I cut up a cheap square sponge into several bits)
  • Black Paper

How to:

Ask the children to paint the back of the leaves with white paint.  Then they place the leaf, paint side down onto their piece of black paper, put a piece of scrap newspaper on top and press down.  Then remove paper and gently pull off the leaf.  This is the most exciting part!  When they have a number of leaf prints on their page they can use the sponges dipped in Autumn coloured paint to fill in the space around the leaves.

The results:

Leaf Prints (Prep & Grade 2)
Cheers
Fiona

Thursday 23 May 2013

Paper Towel Art


Coloured paper towels drying on rack
This is really a fill in we used at the end of a lesson yet I loved it so much I thought I would do a post on it.  Its a great idea to have on hand if you need to entertain your kids on a rainy day with little expense and its easy to set up.

This activity is a great example of process art as its the actual process that entralls the children, they can't get enough of dropping the colour onto the paper towels and watching the colour bleed.  Its also a great opportunity to do some colour theory.  Ask them what will happen if they now place a drop of red on top of some yellow etc.

Paper Towel Art
You will need:
  • Food Colouring
  • Pipettes (I buy mine from The Art Shed for $4 for a pack of 4)
  • Paper Towel (the thicker more expensive stuff works better than homebrand)
  • Newspaper to put the paper towel on if you don't want a coloured bench / table
How To:
  • Mix the food colouring with water in some jars or cups
  • Lay out a sheet of paper towel onto the newspaper
  • Using the pipettes get the children to drop the colour onto their paper towels to make patterns
  • Leave to dry
The Results:

Lots of lovely coloured paper towels.....

You may now ask well what do I do with a whole pile of coloured paper towels?  They could be used for paper mache projects, they could be used for cut paper projects or you could do what I did and make some cards & butterflies with them....

Coloured Paper Towels


Butterflies made from paper towels and pipecleaners

Card made from cut out paper towel (covered with a layer of Mod Podge to give it shine)

Cheers
Fiona

Friday 17 May 2013

Black Glue and Watercolour Paintings

Black Glue and Watercolour Painting (by 7 year old)
So easy, yet so effective.  Black glue and watercolour paintings look both vibrant and colourful.  It's a great way to introduce children to abstract art.  This was inspired from this pin I found on Pinterest. 

This project needs to be done over two lessons so the glue has time to dry.

You will need:
  • Black glue (this is simply clear drying glue mixed with some black paint)*
  • Liquid Watercolours
  • Watercolour Paper
 * Mix two thirds glue with one third paint.  I put this in small squeeze containers with small tips that I purchased from the $2 shop.  It turned out that the amount in the containers was the perfect amount for the children to draw squiggles on their page without going overboard.

My teacher example (I also loved doing this)
How to:

Week one:  Hand out the watercolour paper and glue containers.  Demonstrate how to squeeze the glue over your paper making swirls and loops.  Ask the children to try and use a continuous line (this was difficult for the younger children yet they still turned out nice).  There is something about children and drawing squiggles as nearly all of them tried to write their name in there somewhere...  Leave to dry on a flat surface for a few days (drying time will depend on how thick they applied the glue, it should be overnight yet I had one that took nearly a week as it had a big pool of glue in the middle).

Week two:  Give each child a tray of liquid watercolours with a good range of vibrant colours,  Instruct them to try and paint within any enclosed circles or loops.  The glue will act as a barrier to the watercolour paint so the colours will not mix or bleed into each other.

The Results:
Lovely and colourful and abstract!
A selection of our black glue and watercolour paintings  (sorry due to editing issues only a selection could be displayed)

Cheers
Fiona


Sunday 12 May 2013

Homemade Sugar Scrub and Lip Gloss

Happy Mother's Day to all those mothers out there! 

This week we indulged in one of my other obsessions, homemade beauty products.  I hate putting any chemicals on my skin and usually use homemade or organic products.  I decided a great lesson for Mother's Day could combine jar decoration (craft / art) and beauty product making (which is a bit like cooking).  All Mum's need a little pampering!!  Although this wasn't as creative as our usual activity it did involve measuring, following directions and reading which are important skills for the children to practice.  Ohh and did I mention it was fun and everything smelt yummo!


Homemade Lip Gloss 
(from Wellness Mama)

This is a great simple recipe.  I love coconut oil in lip gloss.  You can also colour this if you wish by adding a natural colouring like beet root powder or a bit of your favourite lipstick.

You will need:
1 tablespoon Beeswax*
1 tablespoon Shea Butter*
2 tablespoons Coconut Butter/Oil (found at Health Food Stores)
10 drops Flavouring (we used Vanilla or Strawberry) (optional)*
Lip Gloss Containers*
Stickers and Permanent Markers to decorate containers
* I purchase these from New Directions.  This is also where I buy my essential oils.

This makes about 15 small containers.  I have lots of extras if people would like more....

How to:
Mix all the ingredients together in a bowl.  Microwave until melted.  Use a pipette or spoon to fill containers. Leave to set (about 10 mins). Decorate jars with permanent markers and stickers.  I also labelled my jars by printing out the words on paper, cut out and glue on the jar.  Hint: Cover with a coat of Mod Podge to make the paper waterproof.

Homemade Brown Sugar and Vanilla Sugar Scrub
(from Chickens in the Road)

This scrub has lovely brown sugar to exfoliate your skin, olive oil to moisturise, vanilla for a lovely scent and honey with antibacterial properties to heal any cuts. You can use sweet almond oil, coconut oil or jojoba oil instead of the olive oil.  I make this with sweet almond oil as well as it has a less distinct smell.

You will need:
2 cups Brown Sugar
1/4 cup Honey
1 tsp Vanilla Extract
1/2 cup Olive Oil
Glass Containers (I used spice jars from Dollar King)

How to:
Mix all ingredients together in a bowl.  Spoon into jars. Decorate jars with permanent markers and stickers.  Tie a ribbon around each jar. Label as above.

How to use:
Wet your body, apply scrub all over body and then wash off.  Be careful as it can make your shower floor a little slippery.  Don't worry too much if your skin is a little oily, once you pat it dry with a towel it will feel soft and smooth.  I also use this scrub on my face as it's not as coarse as other salt or sugar scrubs.  Use once a week.

There are LOADS of delicious recipes on the Internet for Homemade Beauty Products.  Once you start its hard to stop, you save lots of money and you know exactly what is in them.  Try replacing your cleanser with apricot oil and your moisturiser with Jojoba oil, that's all I use.  Coconut Oil is wonderful for your hair.  I add some to my hair as a conditioning mask, leave a while (or even over night) then wash as usual.

Here are some links to more Body scrubs and homemade products:
Homemade Body Scrub Recipes by Homemade Gifts Made Easy
8 Homemade Salt and Sugar Body Scrubs By Tree Hugger
10 Easy Homemade Lip Balm Recipes by Dear Chrissy
Homemade Beauty Products by The Daily Green

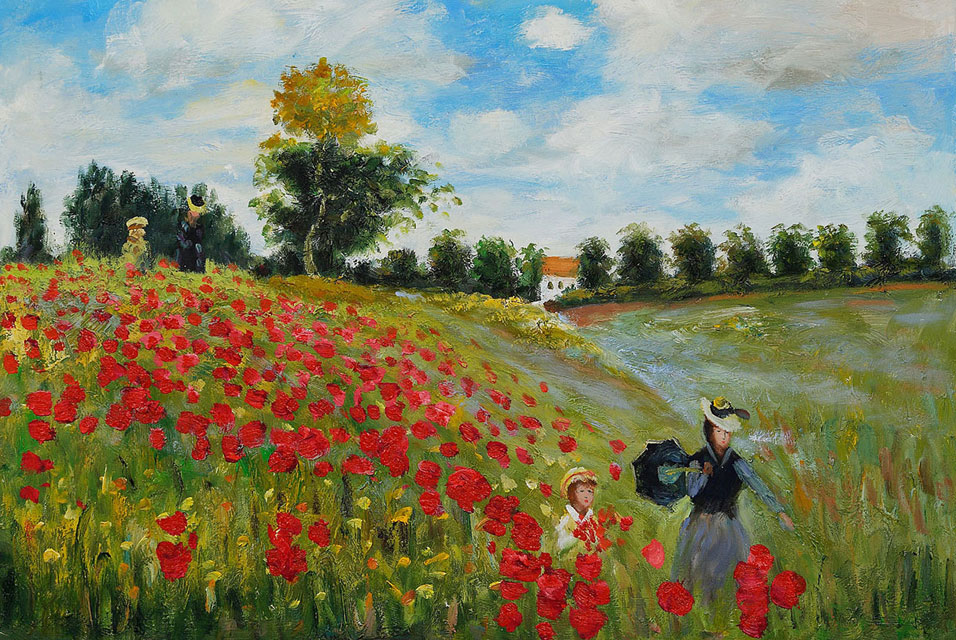
Our artist of the week is MONET since there is a Monet exhibition happening in Melbourne at the moment. Click here for details. I highly recommend taking your children to it (it runs till September so plenty of time).  We will look at Monet's works over the next few weeks and produce our own version of one of his paintings.  I gave the children a copy of his "Poppy Field in Argenteuil"  painting this week since it depicts a mother and child (and its Mothers Day!!).  They may ask you who the Artist of the week is as I haven't told them yet (a little homework???).


Cheers
Fiona